
You can quickly and easily create your own WordPress admin color scheme using the White Label plugin. This feature works in both the free version of White Label and the premium White Label Pro.
First, you’ll have to install and activate either version of the plugin. We have documentation for installing White Label or White Label Pro in our documentation. Afterward, go to the Admin tab of the plugin. You’ll see the Color Scheme section with the following options:
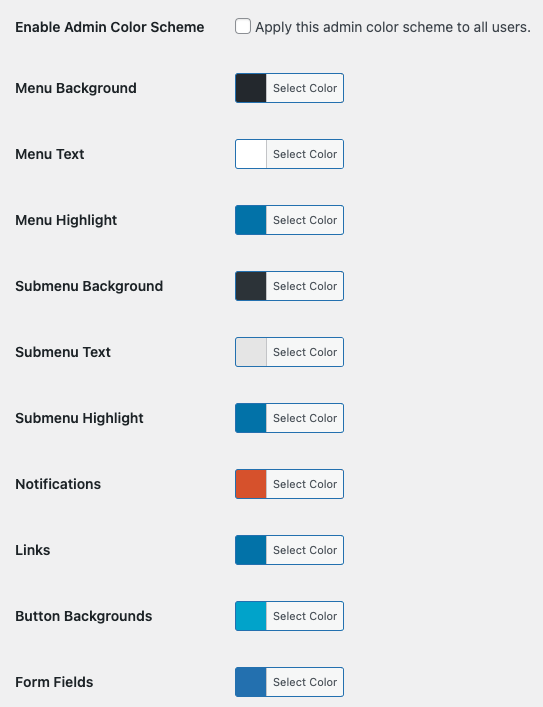
WordPress Admin Color Options
You can set the WordPress admin colors for the following:
- Menu Colors (Background, Text, and Highlight)
- Submenu Colors (Background, Text, and Highlight)
- Notifications
- Links
- Button Backgrounds
- Form Fields
Many of these are self-explanatory, but some might not be clear. Notifications are the tiny icons that appear in the WordPress admin menu. For example, you might have a notification next to the “Plugins” menu item when there are available updates. Form Fields applies to the border color of active inputs (text fields, checkboxes, etc.).
Once you have picked your colors, check the box at the top next to Enable Admin Color Scheme and then press the Save Settings button at the bottom of the screen. Your color changes will apply immediately. You can revert to the original WordPress colors at any time by selecting each option’s current color and pressing the Default button.
Global Setting
Your custom WordPress admin color scheme will be automatically applied to all WordPress users who access the admin. Any admin color scheme a user has selected for their profile will be replaced with these settings.