Should I Rebrand WordPress for Clients?
When we manage clients we want to make sure they feel secure and safe. We generally sell WordPress sites on the basis that it is simple and user-friendly. So we should do everything in our power to provide that experience. An easy way to handle this is to rebrand WordPress to make clients more comfortable.
We feel this area has been lacking in the client handover process. Let’s say you’ve made your fantastic website and taken care of your client the whole way through. You hand them the login details and they’re greeted with a foreign logo and a ton of unfamiliar options. Suddenly they don’t feel so secure anymore.
You may have had clients asking: “What is WordPress? How is WordPress involved in my site?”
To non-technical clients, of course, WordPress is a bit confusing. They may not understand the role of WordPress and that it is an open-source content management system used by many developers. Sometimes it’s not valuable for your client to know that either. The most important thing is to provide your client with the experience and security that they expect. You want them to feel comfortable and secure.
This is where White Label comes in!
What is White Labeling?
White labeling is when you remove all original branding from a product with the option to replace it with your or your client’s branding. You can use white labeling as an easy means to rebrand WordPress.
In this instance, we’re focusing on the backend to remove the WordPress branding from the login and admin areas of your client’s site. Having your branding (or your client’s branding) gives your client a familiar and comfortable experience as well as a higher perceived value of the finished product.
The purpose of our plugin, White Label, is to make your clients feel at home and secure wherever they are on WordPress. If you’re selling WordPress sites professionally, then you might consider White Label to rebrand the backend of your client’s site with your own logos to make it more user-friendly.
Our White Label plugin also allows you to remove unnecessary information from the dashboard and add your own widget with helpful information for your client. In this post, we will show you exactly how to rebrand and prepare your client’s new site.
White Label vs. White Label Pro
Our plugin currently has a free version which we’ll be covering in this article. White label Pro has lots of extra features for advanced users and will be particularly helpful for those of you who have multiple sites and administrators. With White Label Pro you can remove widgets from the dashboard, change the default email settings, restrict administrator access, and much more.
White Label Pro version is suited to businesses whose clients need administrator roles. You can hide White Label and other plugins that aren’t necessary for your clients to use.
For now, let’s have a look at the features in the free version.
Install White Label on Your WordPress Site
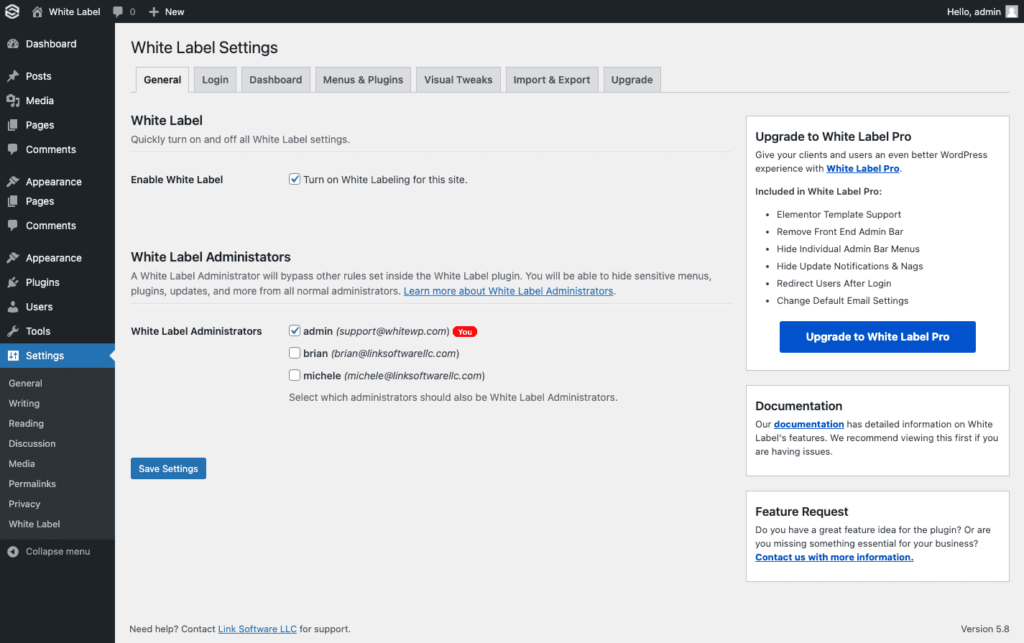
Let’s start by installing White Label. You can find it through your WordPress dashboard. Just search for “white label” from the Add New plugin screen in the admin area. You can also download White Label directly from its listing at WordPress.org.
After you’ve installed and activated the plugin, you will find a new White Label menu option in the Settings area of the WordPress menu.
Only site administrators can see this menu option. If your clients require the administrator roles, have a look at White Label Pro where you can limit access to specific administrators.
White Label Settings
Enable
First, make sure you click the enable box whenever you want your White Label settings to be active. You can deactivate this at any time!
WordPress Login
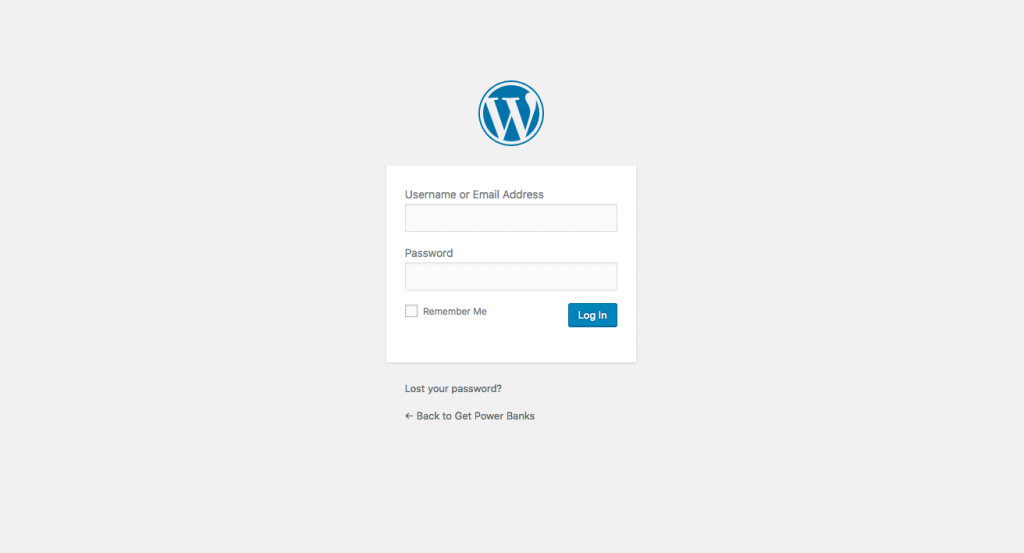
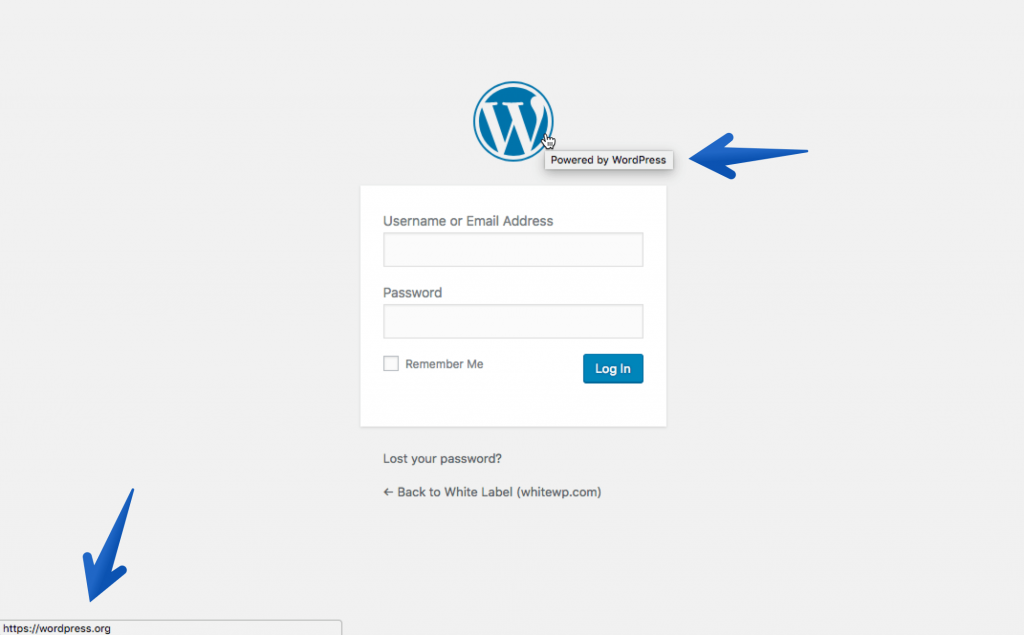
When you give your client their login details for their site, they will be greeted by a big WordPress logo on a blank background. This may look foreign to them because they were probably expecting to see your company logo or their own. Our goal is to make the client feel at home, so we’ve made a few features to help you remove any third-party references that might confuse them.
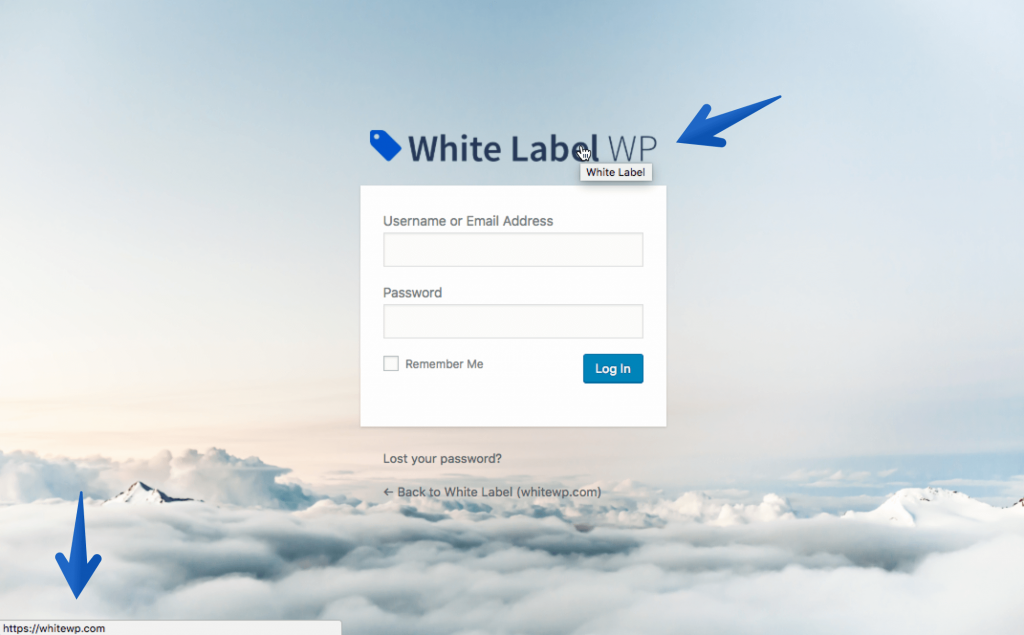
The WordPress Login section allows you to customize the login screen. You can upload your logo (or your client’s logo if you prefer), which will replace the default WordPress logo on the login screen. We recommend using the URL of an external image on your own website here, rather than uploading a file to your client’s WordPress. This way your logo won’t appear in your client’s media library. You can also change the complete background image (again, we recommend using an external image link), or simply select a background color using the color picker tool. This allows you to fully customize the login screen your client sees to match either your brand or theirs!
Before
After
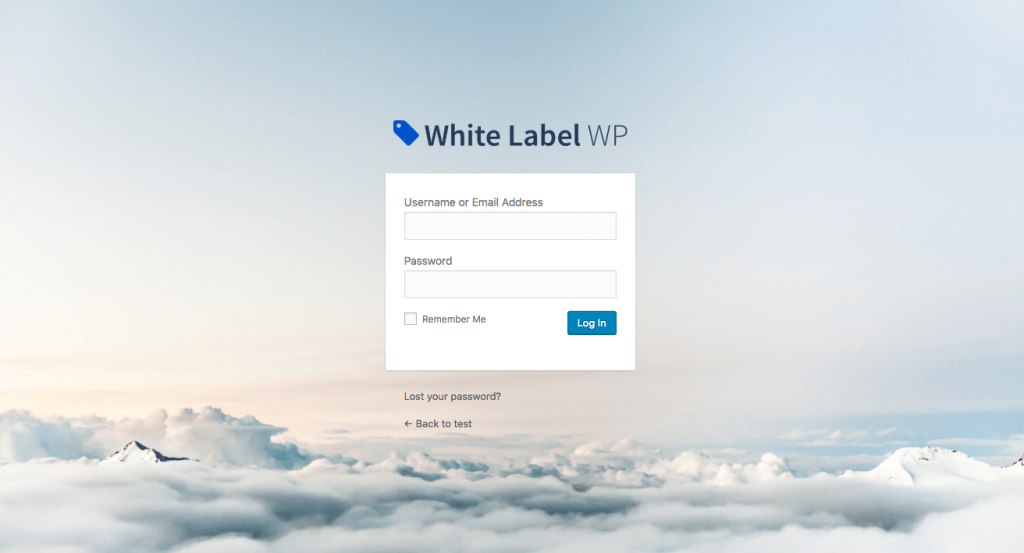
Note that if you do choose to upload your own images, rather than using a URL, you risk your client deleting it from their media library, which means it will disappear from the login screen!
Branding
In the branding section, you can enter your company name as well as your own website link. This replaces the default WordPress title and link attached to the logo above the login screen. Instead, your company name will be set as the link title, and your website will be the link your client is redirected to if they click on your logo above the login screen. You could also make this connect to your client’s site if you prefer.
Before
After
Rebrand WordPress Admin Area
Now we take White Label another step further to customize the admin area your clients see when they log in. Firstly, you can select the option to remove the WordPress logo in the top left corner of the admin bar.
Alternatively, you can opt to replace the admin bar WordPress logo with your own.
Before

After

You can also change the default “Howdy” at the top right of the admin bar to something more professional such as “Welcome”.
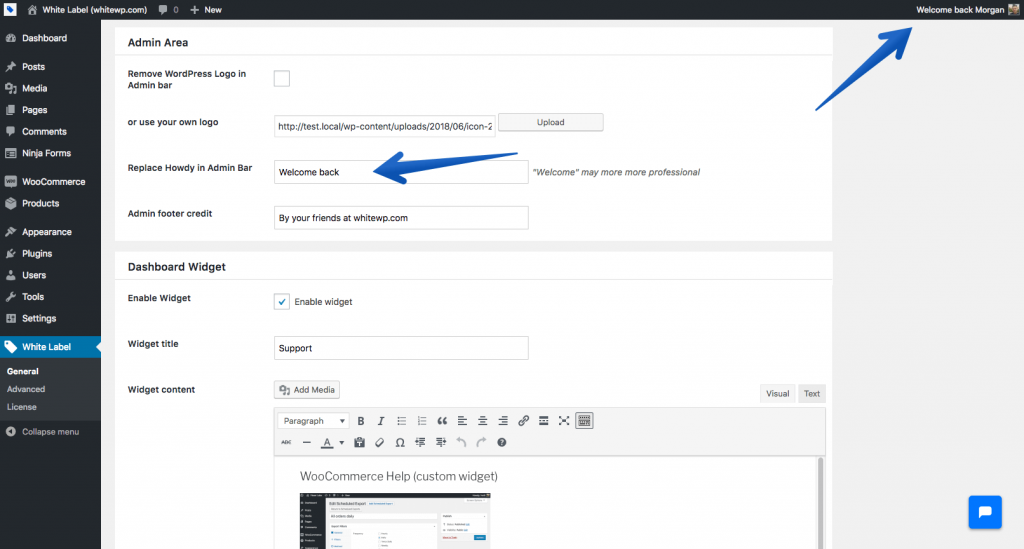
You can fully customize the administration footer credit and replace the default “Thank you for creating with WordPress” with whatever text your heart desires!
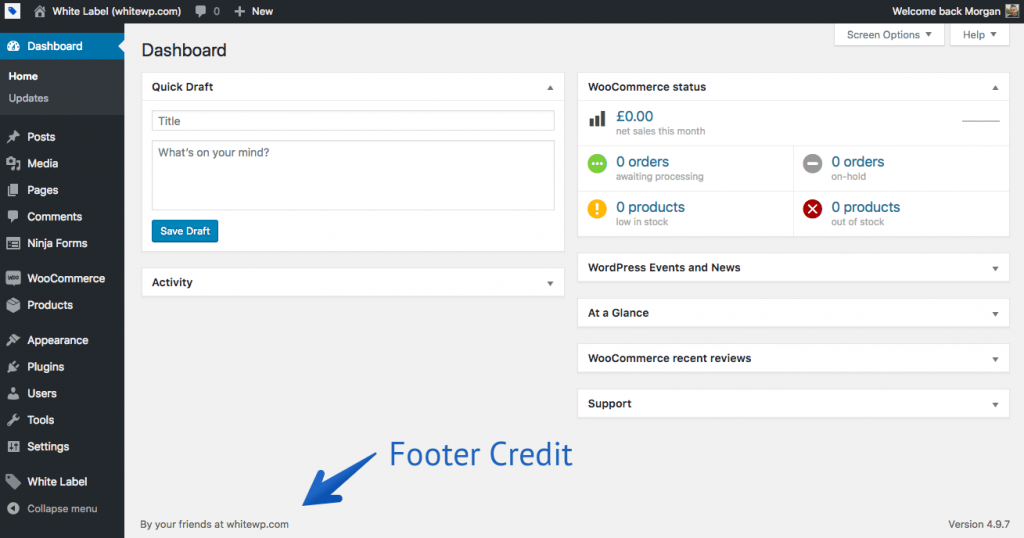
Dashboard Widget
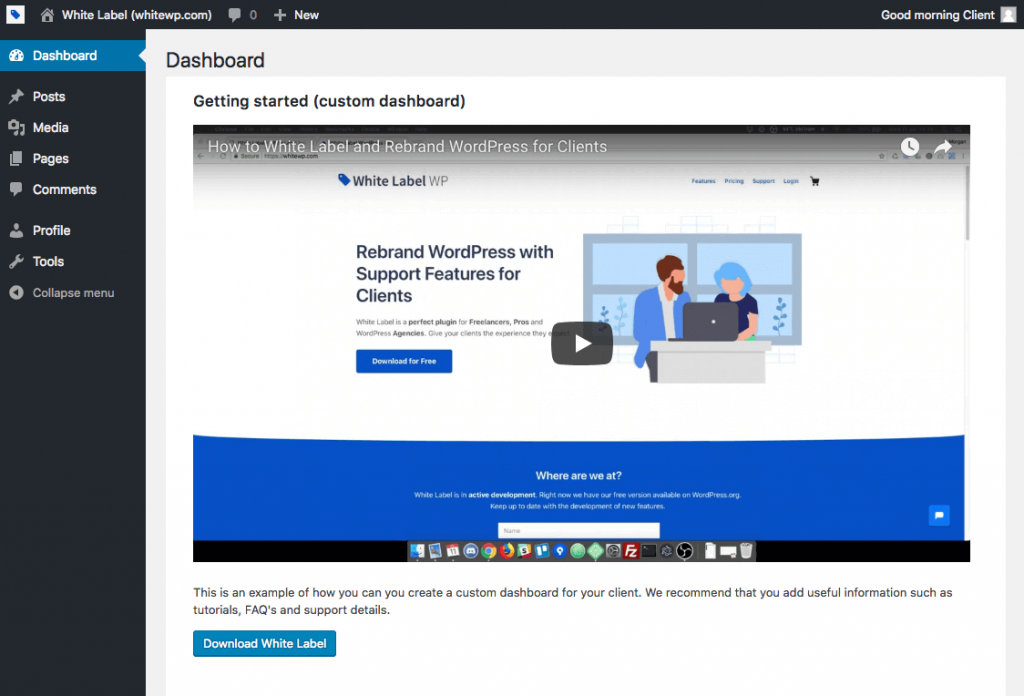
This section allows you to create your own widget that gives your client useful information when they log in. You can include whatever title you want, such as ‘Support’. Use this widget to provide your client with easy access to your contact details, FAQs, and instructions on how to navigate their site easier (and hopefully reduce your amount of client support!). You can even include pictures or an instructional video in this section. With White Label Pro, you can selectively remove other unnecessary widgets.
Live Chat
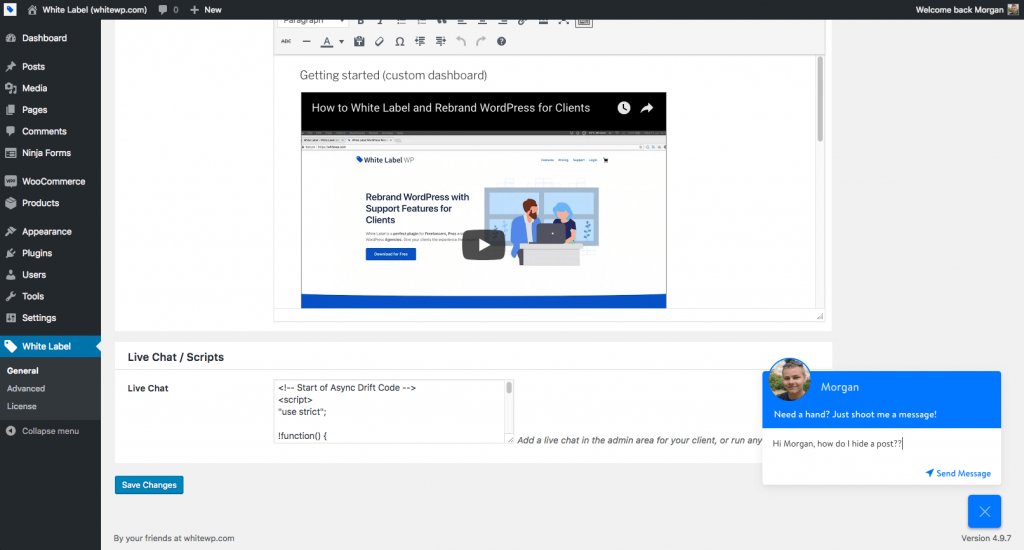
This section will run any Javascript on all of your administrator pages. All you have to do is copy and paste the live chat code from your favorite live chat provider. Your live chat will now appear on all of your administrator pages in the back end! This is a great feature that you can use to make your clients feel extra supported with an easy way to contact you when they’re confused about anything in their WordPress dashboard. You could even consider setting up an automated chatbot for commonly asked questions.
Use White Label to Rebrand WordPress Today
We hope you enjoy using White Label. Feel free to contact us if you have any questions or feedback.
Is White Label helping your business? We would love to feature your business in our blog! We’d also be stoked if you love our plugin enough to upgrade to White Label Pro! Stay tuned for more developer updates.
