How to Create a WordPress Dropbox Backup Every Day for Free
WordPress powers around 40% of the internet. It’s so popular because it’s free and easy to use. However, being such a massive open source content management system makes it prone to a wide range of attacks and exploits. This is why backing up your WordPress site is super important. You can never have too many backups. Let’s discuss the best way to handle this issue. We’ll be using a plugin and the popular Dropbox storage solution for this. By the end, you’ll know how to create a WordPress Dropbox backup at no cost.
First, In case you aren’t convinced yet about backups, here are a few more reasons why you should consider making them regularly:
- To have a Plan B if your site is attacked by malware
- In case one of your well-intended updates breaks your site
- To have an easy way to restore your client’s site in case they accidentally delete something
- To have a copy of your data in the event that your hosting company has a data loss accident or malfunction
We back up most of our WordPress sites to Dropbox daily and it works very well. We’ve tried and tested a lot of backup plugins to find the best one.
Our Favorite Backup Plugin is BackWPup
We love what the team behind BackWPup is doing. Their free plugin has scheduled database and file backups. You can also selectively back up your plugins. Basically, you can backup your complete WordPress site. The plugin allows backups up to multiple locations, such as to the server, FTP, S3, and our favorite: Dropbox.
How to Setup BackWPup to Run a Daily WordPress Dropbox Backup
Let’s go over the short version first. We’ll go over the settings in more detail with screenshots below.
- Download and install BackWPup from the Plugin Repository
- Select Add New Job in the sidebar menu
- Give your backup a name and select Dropbox as the destination
- Select the Dropbox Tab
- Select authentication method
- Copy the code from Dropbox
- Paste the code back in the plugin
- Run your first backup!
Now let’s go over the full setup. The first step is to install BackWPup. Don’t worry, it’s free! Look at the admin sidebar go to Plugins and then Add New.
Search for BackWPup and hit the Install Now button and then Activate. You will now be greeted by a few messages from the team. You can skip that for now and head over to Add New Job in the sidebar.
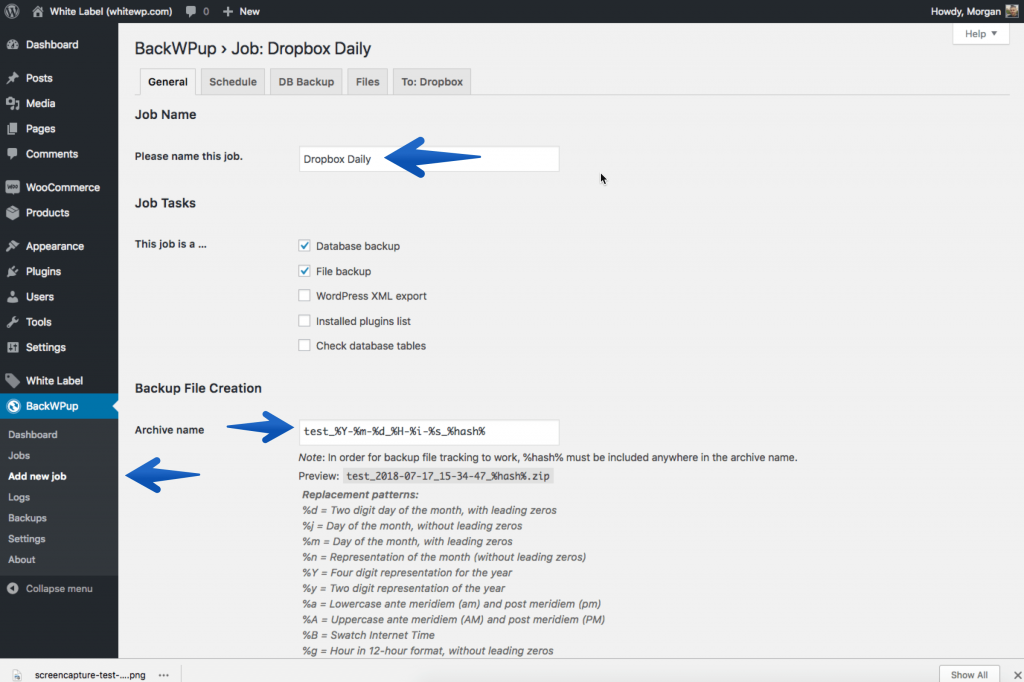
Add New Job
There are a few things we need to set here.
Let’s get started with giving our backup a name. One easy way to name this is with your backup location and schedule, such as “Dropbox Daily” or something similar.
The archive name is the name of the compressed backup file which contains your website and everything else you’ve selected. Date shortcodes are added by default. They will automatically put the date of your backup in the name of the compressed file. You can name it however you want. We’ll add “test_” to the front of ours so we can easily tell our backups apart.
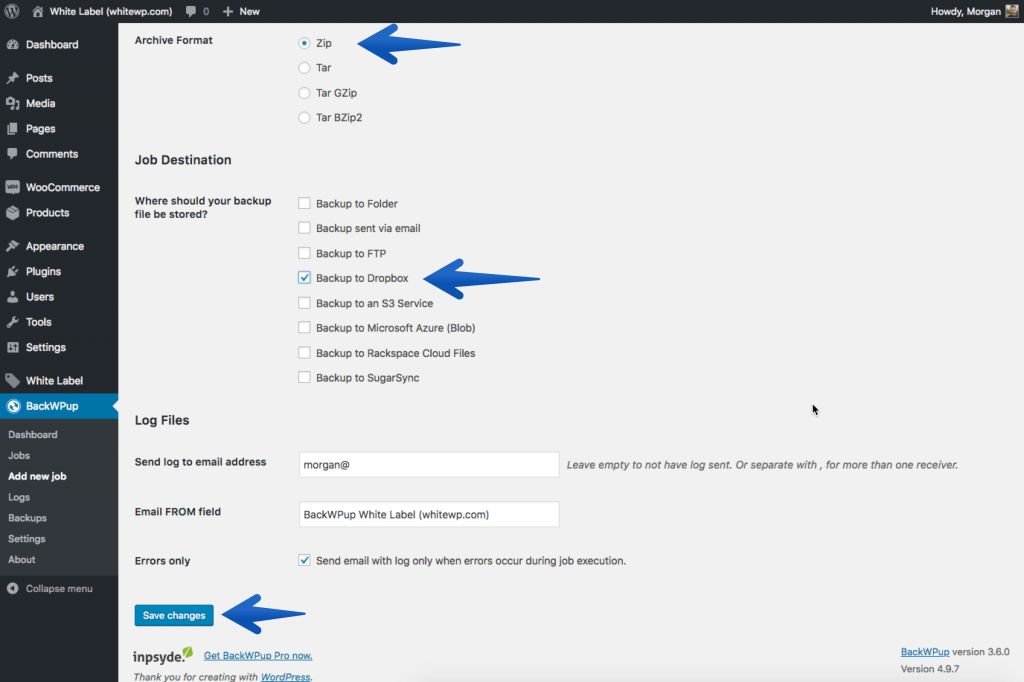
Next, we will select which format to use for our backup. We prefer .zip files because they’re easy to deal with and we’re able to import the whole site into our local development environment.
The next step is to choose the backup destination. This is where we select Dropbox. You can add multiple destinations if you wish. If you choose the folder destination, then a backup will be stored on the website server as well.
Schedule a WordPress Dropbox Backup
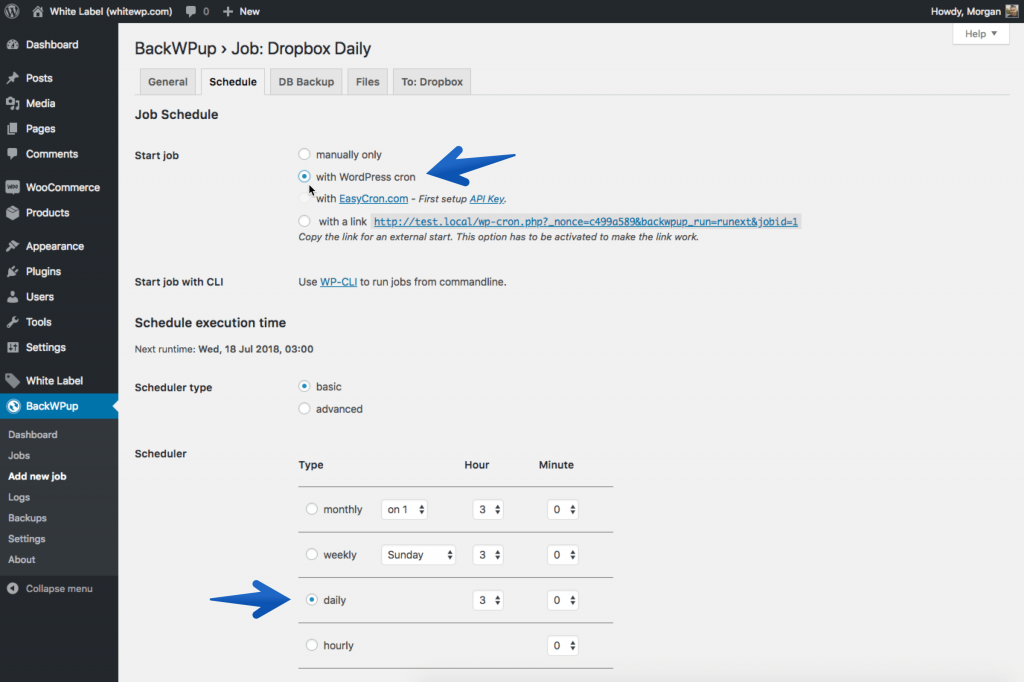
The schedule tab allows us to select how often the backup should run automatically. Alternatively, we can choose to do this manually. We use WP-Cron and have it back up daily at 3 AM. WP-Cron is WordPress’s default scheduler and doesn’t need further installation like the EasyCron option.
Database
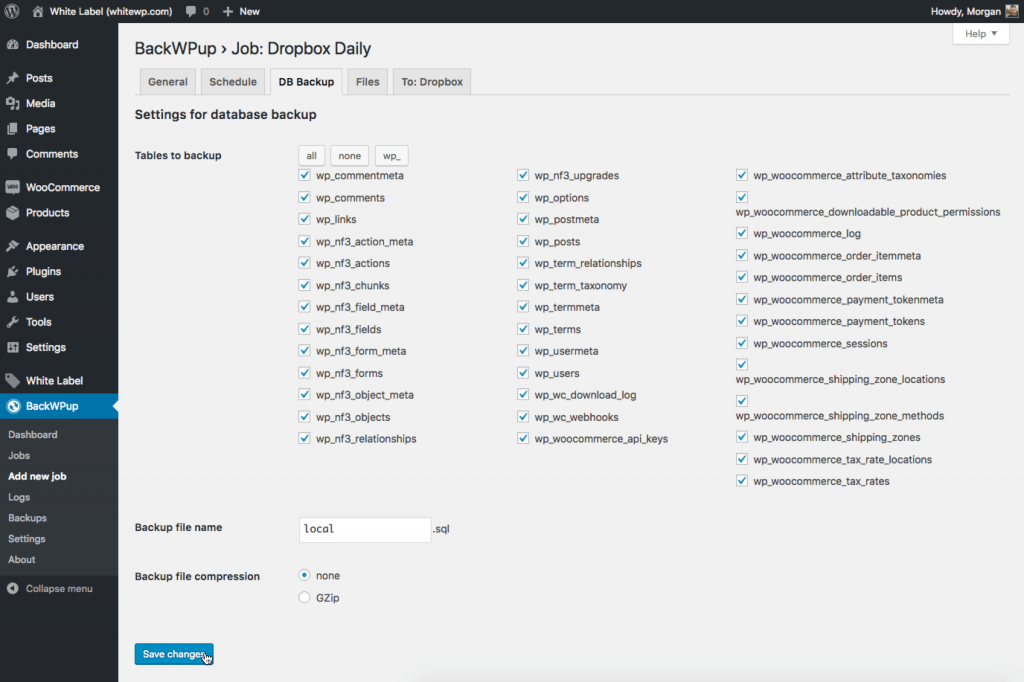
We leave all of the database tables selected for a full backup. We recommend you do the same unless you are familiar with the WordPress database structure.
Your database will be backed up and compressed with the rest of your files. You can change the name of the database file and further compress it if you think you have a large one.
Files
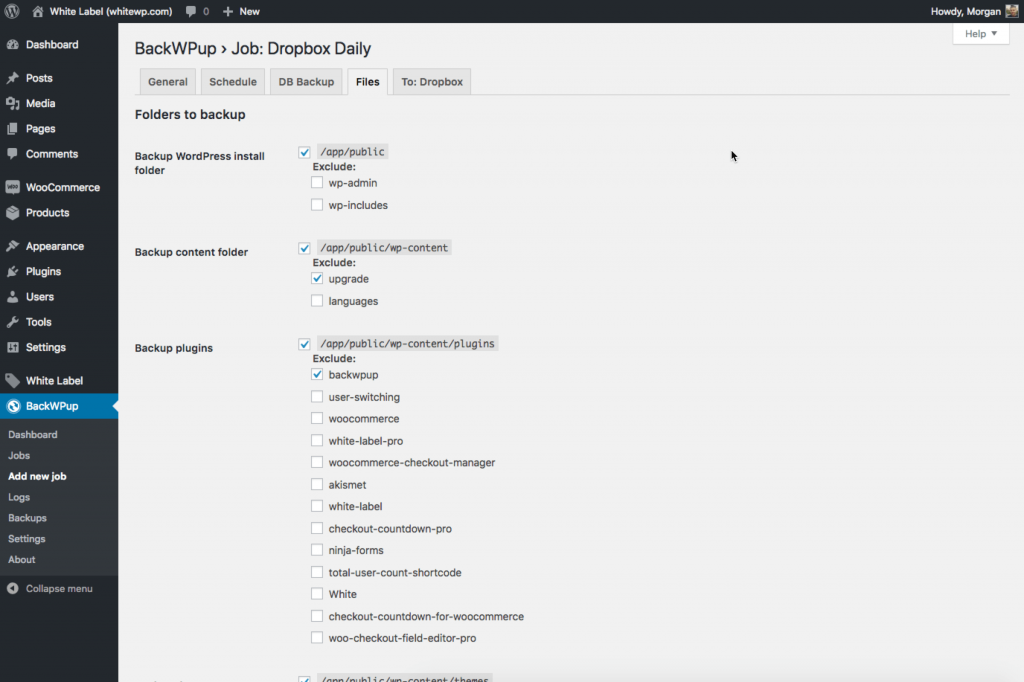
The files tab is much like the database options. You can specify which folders, files, or plugins to include in the backup. The defaults are set for the most common use.
To: Dropbox
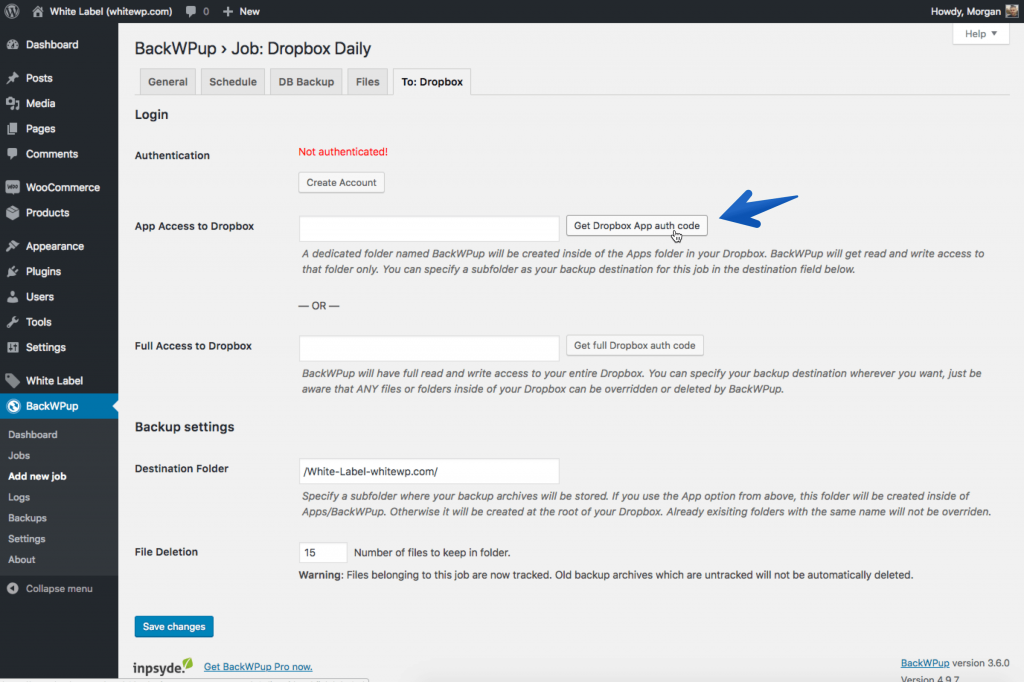
Time to authenticate our Dropbox account. It’s simple and straightforward. We prefer using the first option “App Access to Dropbox.” Basically, BackWPup will only have access to one folder in your account. Click “Get Dropbox App auth code” and you will be asked to log in.
Once you’re logged in, simply copy the code on the screen and head back to the settings to paste the code.
The Destination Folder is a subfolder that you can set up within the main BackWPup folder. You can add as many subfolders as you want if you have multiple sites backing up.
File Deletion will make sure that your Dropbox storage doesn’t go over the limit. You can set exactly how many versions you want to keep. The plugin will automatically delete the oldest if the limit is reached. Hit save.
Running Your WordPress Dropbox Backup
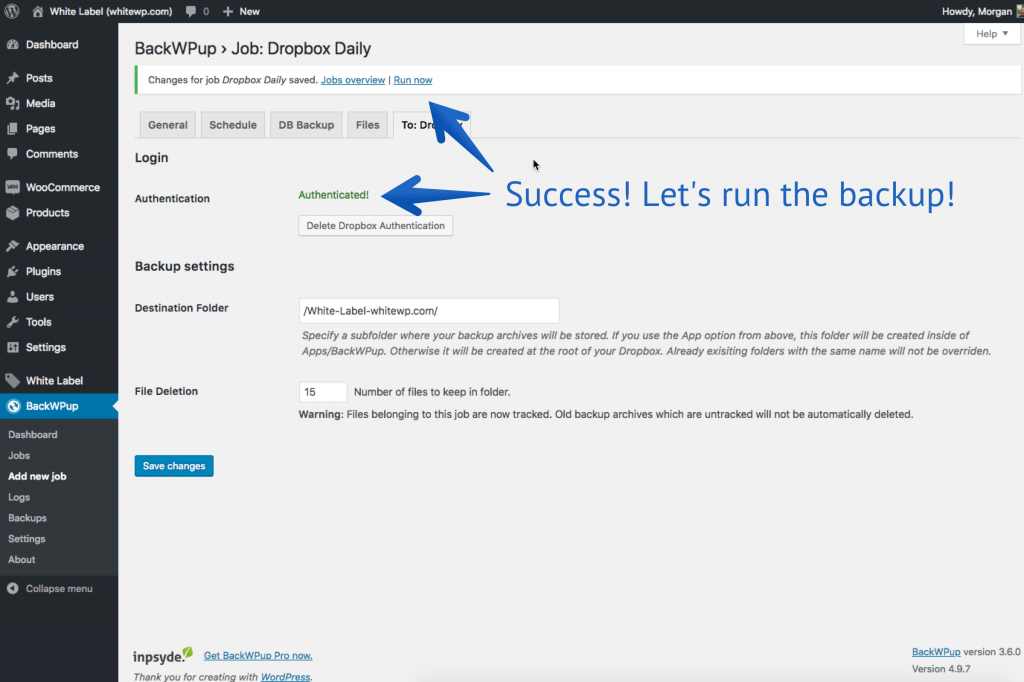
Now we have successfully set our WordPress documents and database to backup daily into our Dropbox account.
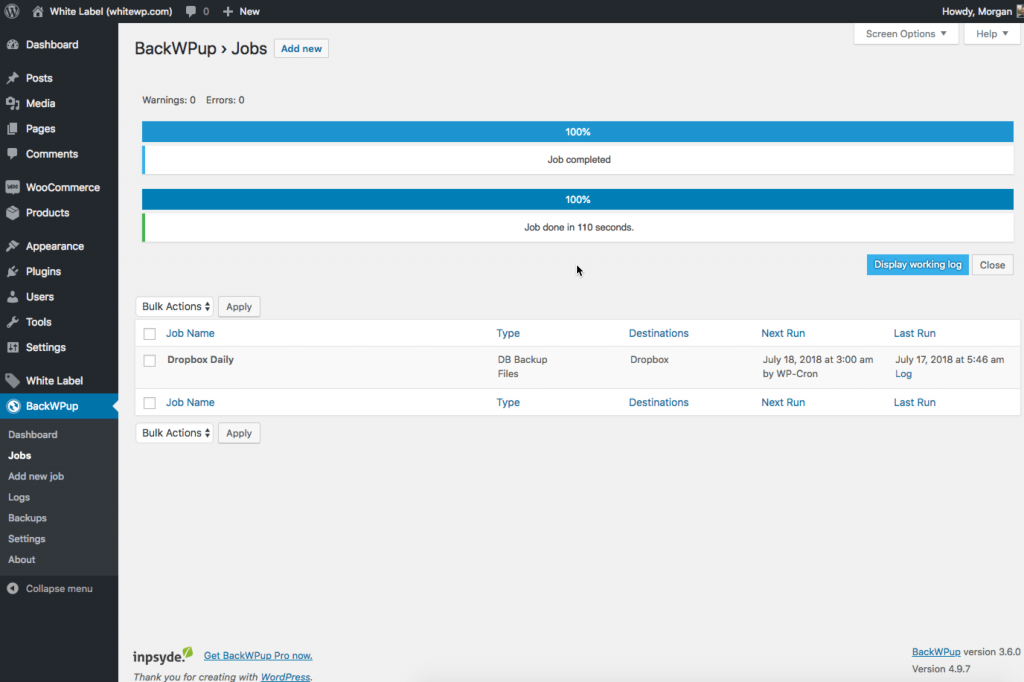
Let’s try to run the backup manually. We can do this from the notification banner or from the Jobs menu at any time. We can follow the process bar to make sure everything runs smoothly.
It’s done!
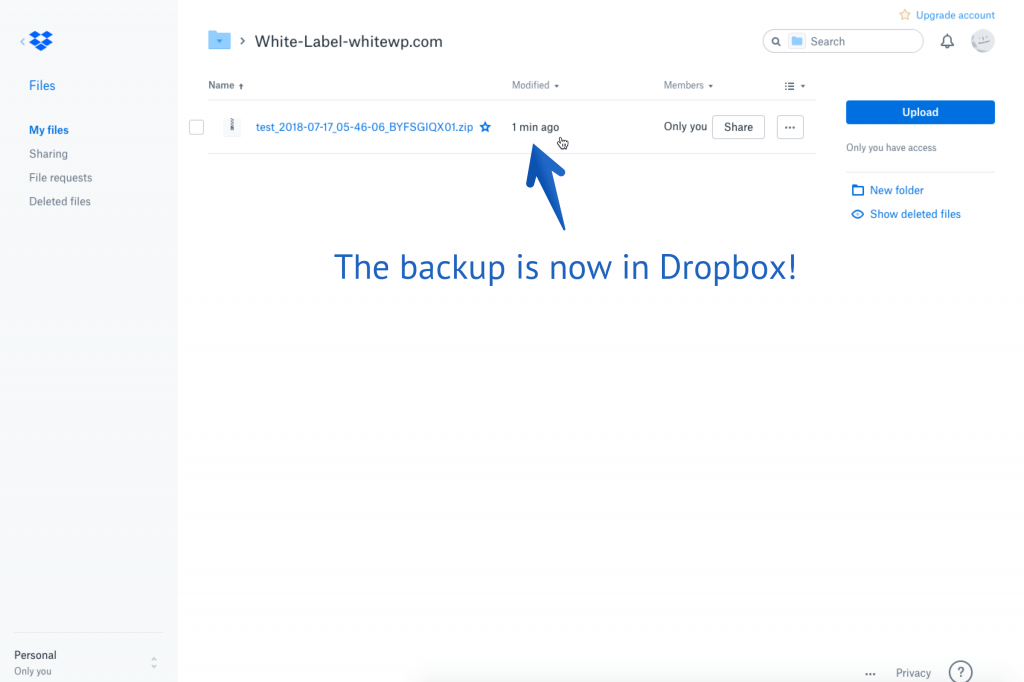
Now you can see our completed backup file in Dropbox. We do recommend storing your backups in more than one place so you are extra secure.

