White Label Pro, the premium version of our free White Label WordPress plugin, has additional features built around customizing and modifying how themes display in the admin. One of those features lets you rename a WordPress theme. This change will reflect throughout the Themes page of the admin. It will only take you a few seconds.
As we mentioned, the rename a WordPress theme feature is exclusive to White Label Pro. To start, purchase and install the White Label Pro plugin. You can find out more details on how to install White Label Pro in our documentation.
Rename a WordPress Theme in the WordPress Admin
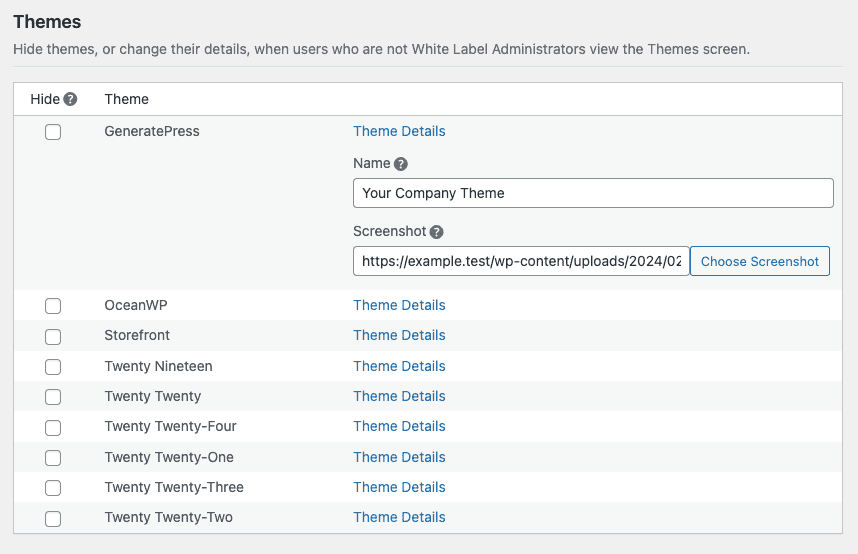
Once you have the plugin installed and activated, pull up the Theme tab in White Label Pro settings. This tab has all the theme-related features found in White Label Pro. To rename a WordPress theme, simply find it on the list and click the Theme Details link next to its name. You’ll see an interface that looks like this:

In the Name field, enter in whatever you want this theme to be displayed as on the WordPress admin’s theme page. Click the Save Settings button once you’ve changed the themes you need to rename.
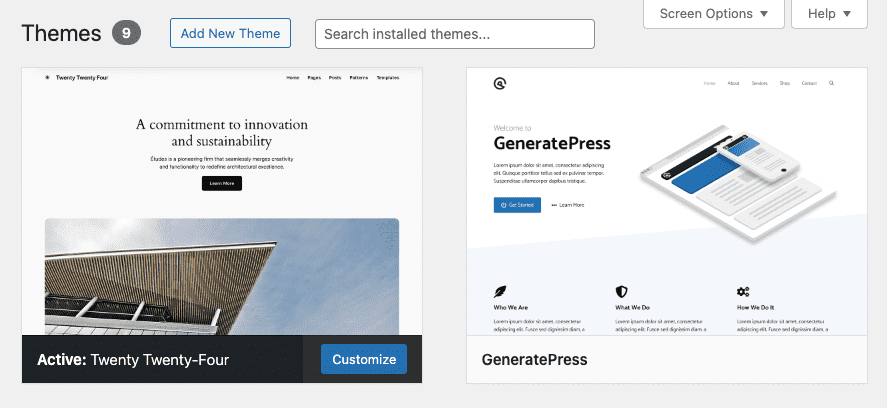
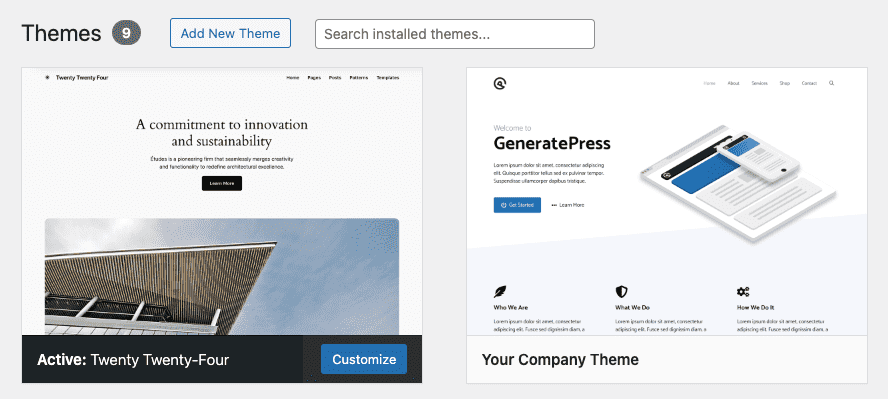
Here’s an example of how your theme will look before, and after, you’ve saved your changes. As in our example screenshot, we’ve changed the name of GeneratePress to Your Company Theme:


Note: This change will only be reflected on the WordPress admin’s Themes interface. To change any references to a theme’s name in the menu, you’ll need to rename the WordPress menu item to match.
Additional WordPress Theme Customization Options
White Label Pro lets you modify other parts of themes and the Themes screen in the admin. Our plugin lets you change theme screenshots and hide themes from admin users. You can even remove the Customize, Activate, and Preview buttons, and much more. Read more about the ways White Label Pro helps you control WordPress themes by viewing our WordPress theme documentation.
