The White Label WordPress plugin offers users many ways to customize their sites. Menu changes, rebranding, and much more. In addition, it offers support for individual third-party plugins like Elementor. The world’s most popular page builder, Element comes with a lot of built-in branding. For WordPress developers, our plugin lets you modify that branding. Or, as our feature in this article shows, adjust the Elementor editor’s interface to suit your needs. Today, let’s look at how to hide Elementor editor navigation items.
Install and Activate White Label
You will have to install one of the versions of our White Label plugin. The free version contains the same Elementor-focused features as our premium plugin. So you can start there and upgrade later if the other features of White Label Pro interest you. We’ve written guides on how to install White Label and how to install White Label Pro if you need help.
Hide Elementor Editor Navigation
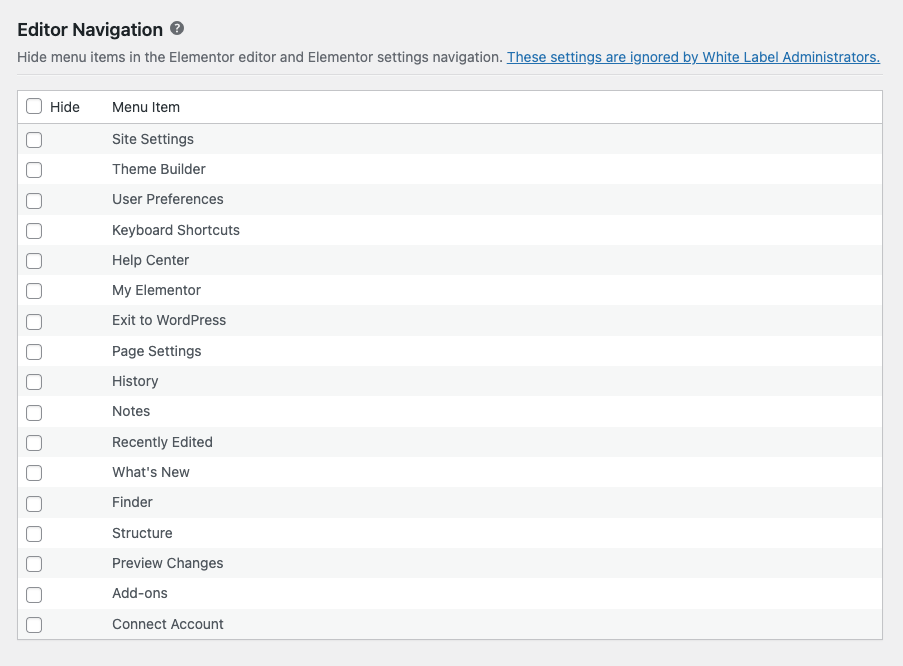
It’s time to get to work now that you have White Label installed. Head to White Label’s settings and find the Plugins tab. You can scroll down to find the section for Elementor. The area for Editor Navigation is clearly labeled and will show you a list of possible editor navigation items for you to hide:

All you need to do is check whichever menu item you want to hide. Once you’ve made your selections, press the Save Settings button. Immediately, the navigation items you selected will no longer be visible to other admin users. That’s all there is to it. As an added bonus, these settings also impact the menu items on the settings screen of Elementor.
Note: Menu items labeled as “Out of Date” were functional on older versions of Elementor or Elementor Pro. We leave them in White Label in case you’re using one of those older versions on your WordPress site.
More White Label Elementor Features
You can use White Label to make additional modifications to Elementor. Our plugin supports replacing and removing Elementor logos, colors, text, and more. We have an entire article discussing all the ways you can use our plugin to white label Elementor. On top of that, we have written individual articles for each feature that you can find in our Elementor documentation.
